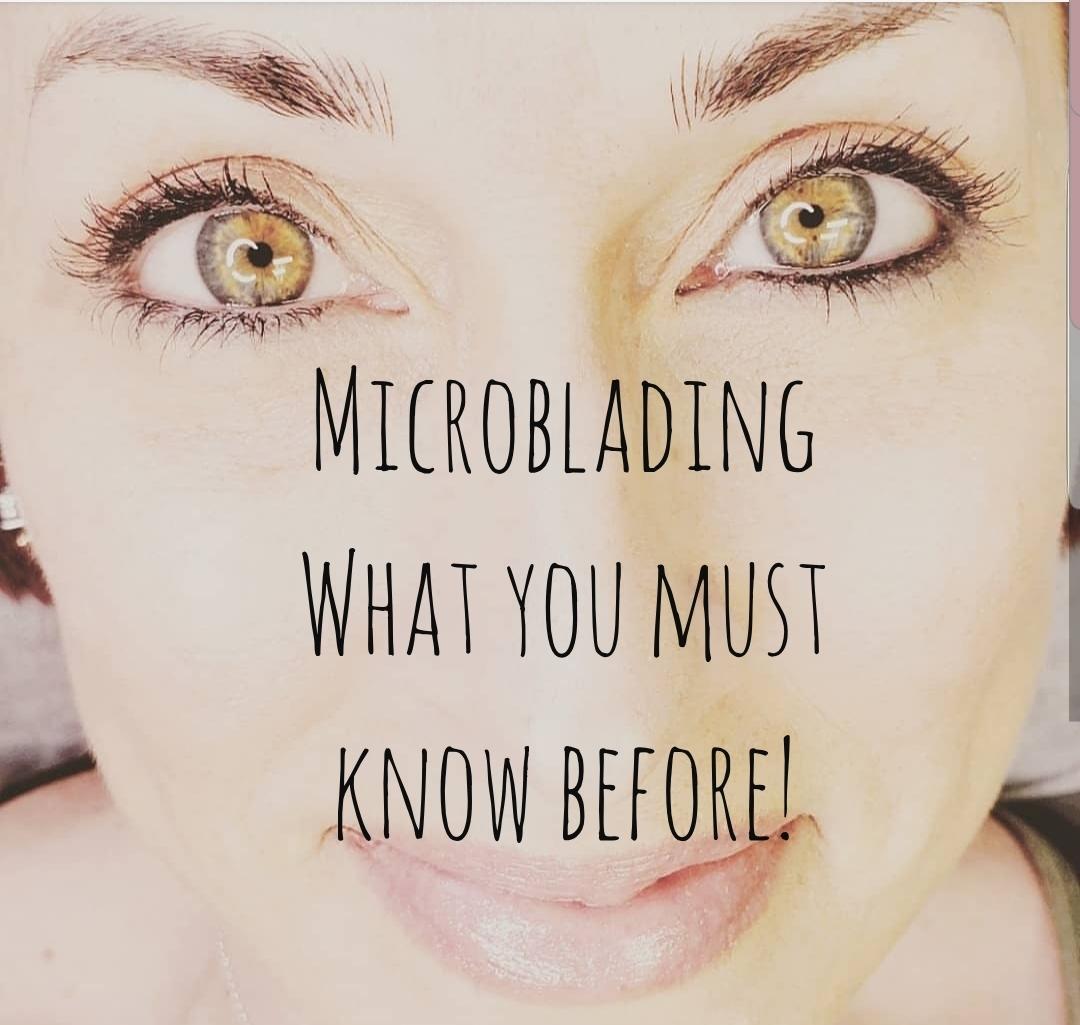


I am sure by now that you have heard the term “Microblading”.
But,what exactly is microblading and does it hurt? Is it permanent and what is the process and healing time? I guarantee that these are some of the questions that you may have. Well, I am here to tell you about my experience and walk you through the process!
WHAT TO KNOW BEFORE YOU DECIDE ON MICROBLADING.
I have had a love/hate relationship with my eyebrows for some time now. As a teenager, I had great full brows. But during my early 20’s the style was to have “Thin” and very well manicured brows. For years I got them waxed and also tweezed. Once I heard about “Threading”, I started to use that technique. One day during waxing, a little too much wax was dropped on one of my eyebrows. After that, ONE eyebrow was NEVER the same!
A few years back, I heard about tattooing for eyebrows. I was a little curious but it just wasn’t the exact look that I wanted. Then I started hearing the word “microblading” and I was confused?! Isn’t it the same thing? I am here to tell you that no, it is not the same. After researching and my personal experience with the process, I now am able to share this information with you!
Microblading vs. Tattooing
Microblading and tattooing are two different processes.
Tattooing uses a liquid tattoo ink and it is permanent. Microblading uses a very fine blading tool and a specialized “pigment” is used. It is semi-permanent. Over time the “pigment” that is used, naturally fades to retain a “Natural appearance”.
Microblading artists hand draw each line, Tattoo artists use a tattoo gun. Microblading features very fine lines and when applied by a skilled artist, can last an average of 1-3 years. Both are great options, you just need to see what works best for you! Microblading has been said to be less painful then tattooing and gives more of a natural appearance.
- Microblading creates brows that are defined, yet natural.
- Microblading pigment maintains its color
- With Microblading, you’re not applying harsh chemical dye on your skin
- Microblading is virtually painless, some say pain free
- Microbladed brows are semi-permanent and can be reshaped
Choosing between Tattoo and Microblading.
How do I choose?
It is defiantly is a personal choice. You need to ask yourself is this something that you want to have permanently-like for years and years? Or something that you want to try out for a few years? After LOTS of research I decided on microblading. I was very nervous about having something completely permanent…you know, just in case! I researched over a year and contemplated what to do. I followed a few artists on instagram and a friend highly suggested an Artist in San Diego, Ca. So I started to “stalk” her #iG page and really get to know what her work was like. Finally after about 6 months I decided to reach out to her and ask her a million questions. She was super sweet and helpful. I took the information she shared with me and processed it for about another month. I then FINALLY decided to go see her in person for a FREE Consultation.
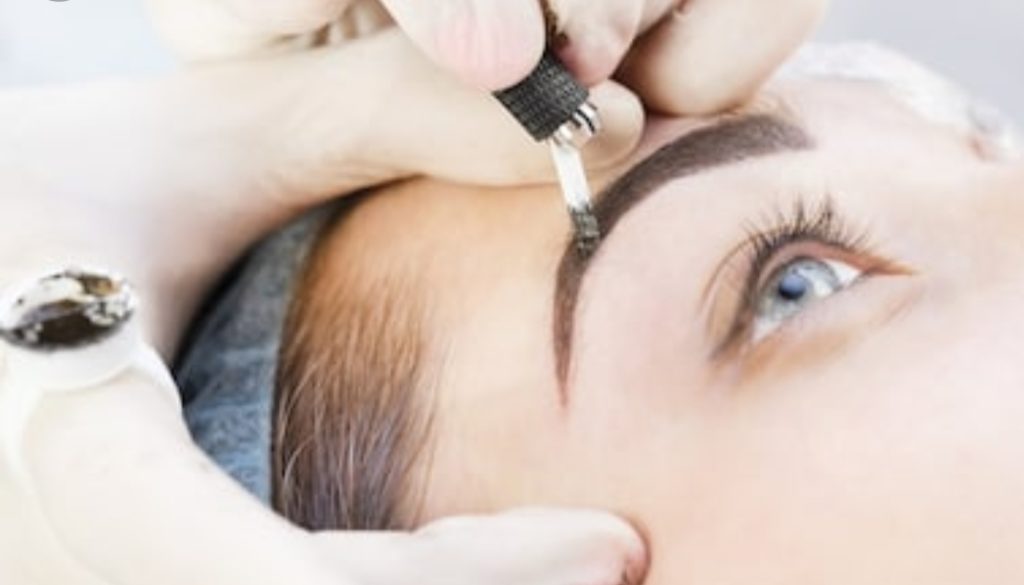
What is “micro-blading” exactly?
Some say to think of microblading as a tattoo, but not as deep or painful. But I feel that there is a huge difference in the two.
In microblading, the brow artist uses a pen like tool which is outfitted with seven to sixteen or more “micro” needles. The micro needles are so tiny. This helps to create the think hair like strokes. There is also a few other techniques such as “plucking’ and “shading”. Most artists have a few options to choose from.
How much does it cost?
The coast varies depending on your area and the experience of the artist, but can often go up to $1600 for the first treatment! (Rest assure- My artist is REALLY good and AFFORDABLE!!!!)
Does it hurt?
The first session will take anywhere between 1.5 to 4 hours depending on the artist and what “magic’ needs to be created. This includes paperwork, consult and developing/ mapping your face.
Here is the BEST news… It does NOT hurt!!! A numbing agent is applied and your skilled artist knows exactly what to use. No need to worry!
My Experience
Experiences & healing will be vary, but this is my Personal experience-
My microblading experience was great one. My Artist made me feel very comfortable. She was professional yet very friendly. She listened to all my questions and concerns and answered them all.
Being that she had years of experience as a Professional Make-up artist, I also felt very confident in her knowing what would look best on my facial structure. I did show her photos though to give her an over all idea of the “look” that I was going for. *Lots of looks to choose from on Pinterest
Time to get started-
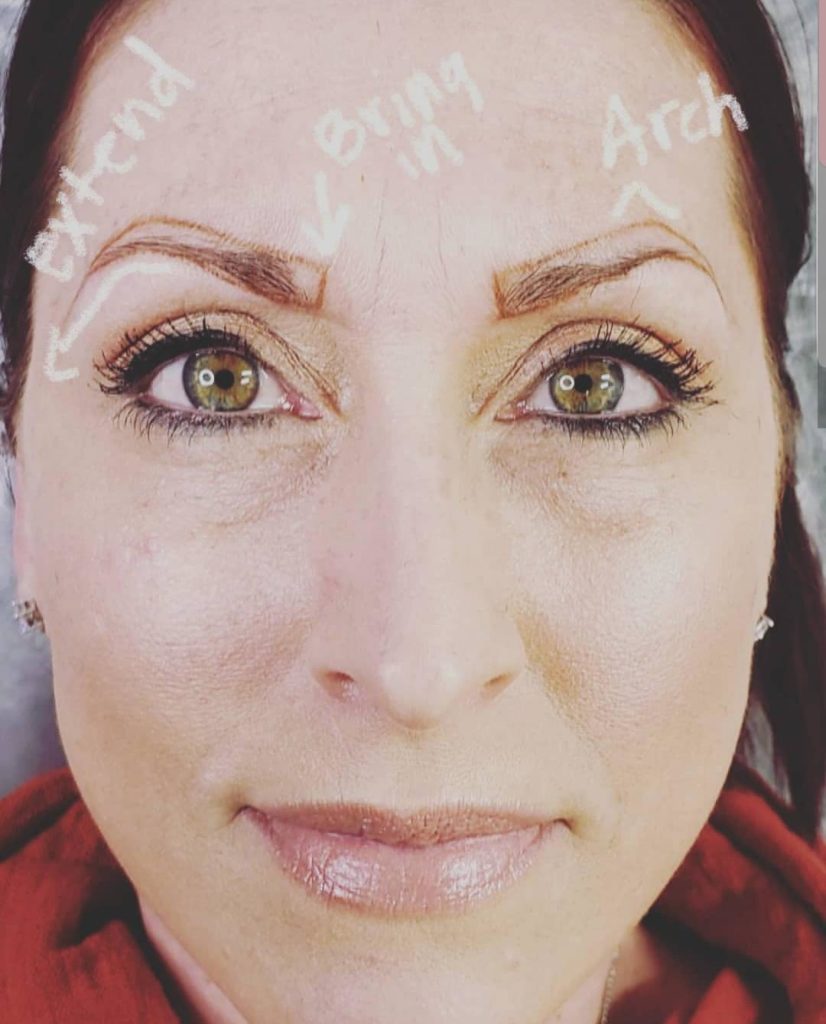
First the artist maps out the perfect fit for your face structure. Then puts a topical numbing agent on your skin. This helps you literally feel almost nothing during the process. It does take awhile for the process, but I would rather the artist take their time and work their magic! Hence, the word “ARTIST”. Microblading is an art and artistry done right can take time!
I didn’t peak at my eyebrows during bathroom breaks. I wanted to completely be surprised. Believe me, the end result was better then I imagined. I actually had brows!!!!! I was so happy and excited. I actually was in “Happy shock”! I didn’t realize I would be that happy! It was worth the wait!!!! I am so happy that I wanted to find that PERFECT match.
Julie was an amazing artist!! Happy-Dance!!!
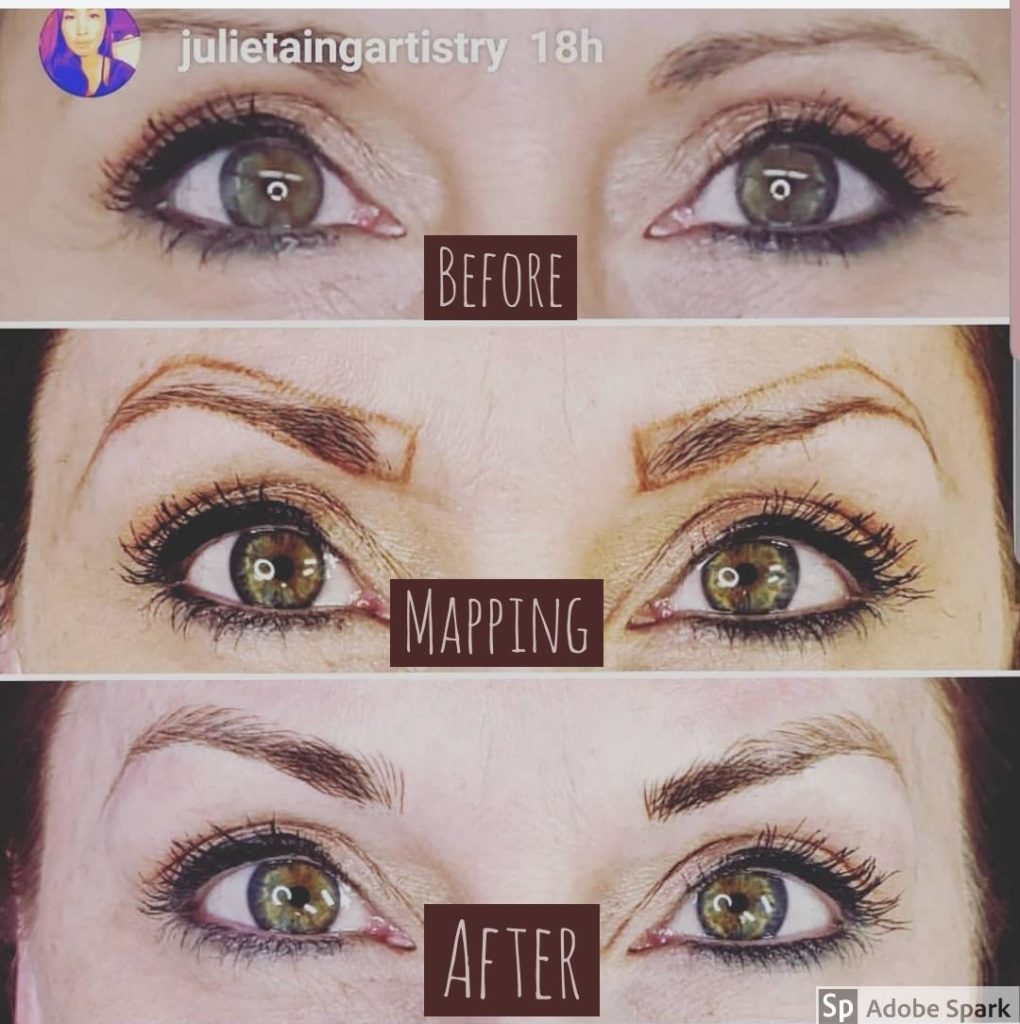
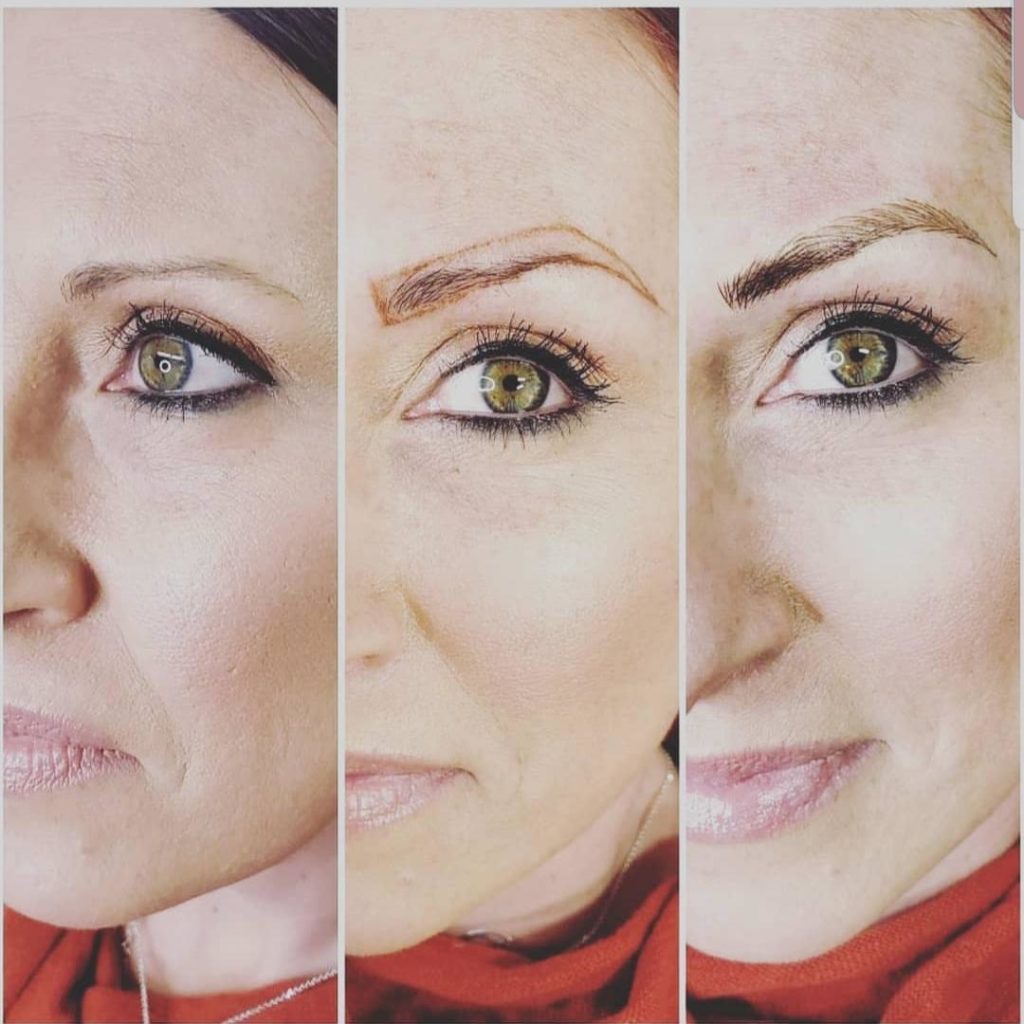
The Microblading Process
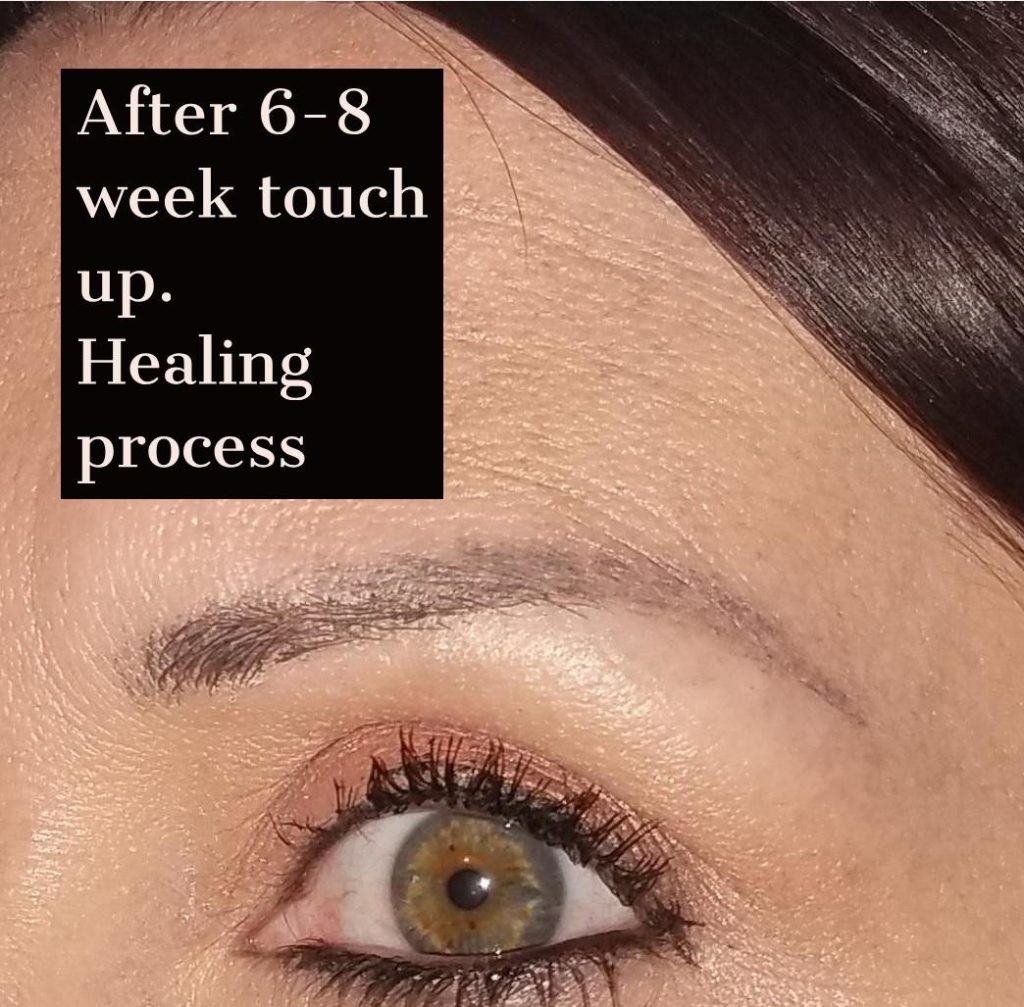
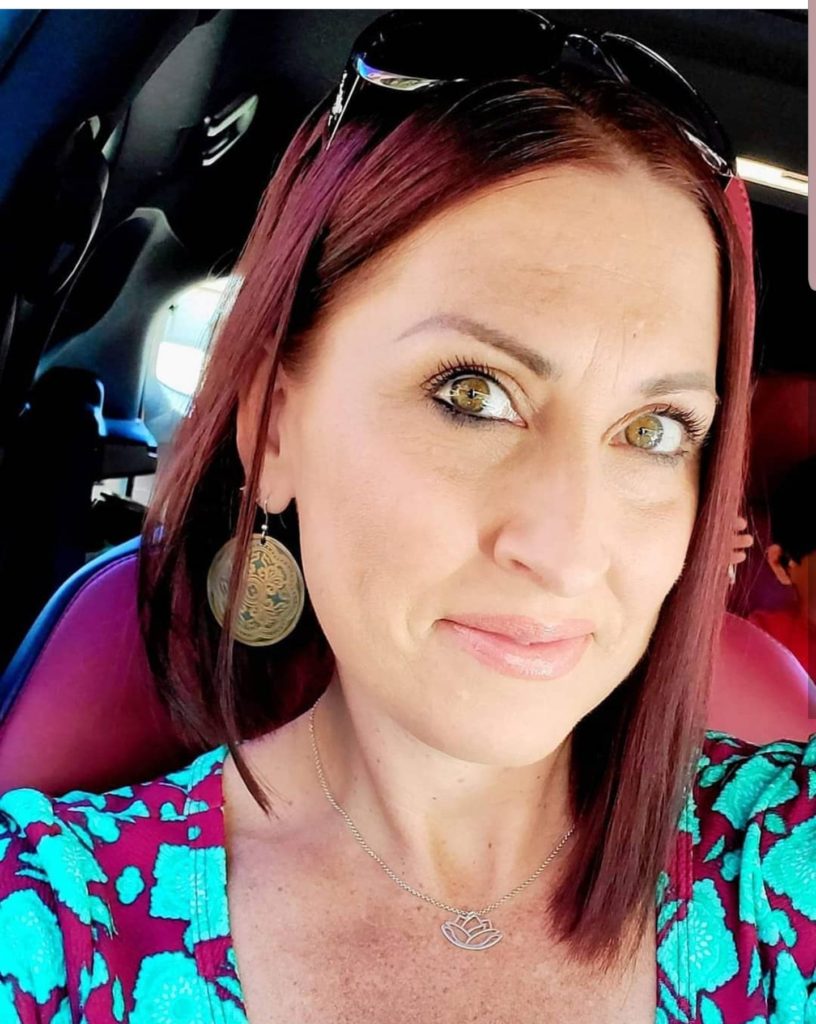
She “mapped” out my brows and shaped them perfect for my facial structure. As you can see in the first photo, my brows were very thin. She gave me brows and an arch!!!!!
The Healing Process
Questions you may have…
Does it hurt? –No, if you have a good artist, it should not hurt.
How long is the process– it depends on the artist. Average is 3+hrs
What is the healing process and time?– love & patience!
When can I start to wear make-up– I suggest to wait at least one month before applying make-up to brow. Brows need to be fully healed.
Oh no! Will I look “Funny” for weeks?– Everyone heals differently. The 2nd day was rough for me. They were so dark! Some say the scabbing process is hard. I just wore a cute hat to cover my eye area. No pain, no gain! beauty comes with a price!
10 Important tips on care
At home care is crucial for the healing process.
DO NOT scrub them, pick at them, scratch them or rub your freshly microblading brows. This can damage the pigment and you will not get the results that you want!
Cleaning-Use witch hazel and a cotton pad to GENTLY pat them. This will help clean as well as soothe.
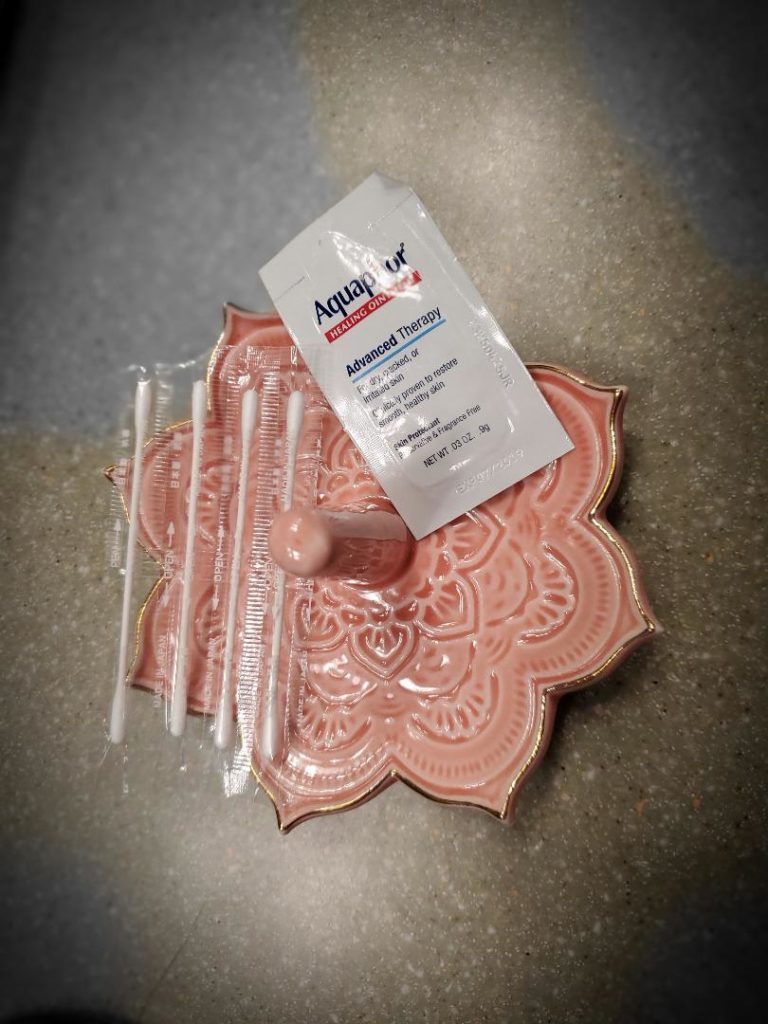
You can apply a very THIN layer of Aquaphor with a cotton swab to heal soothe and heal.
It is very important that you do not wash your face as you normally would each night. No soap or make up remover on eyebrow area.
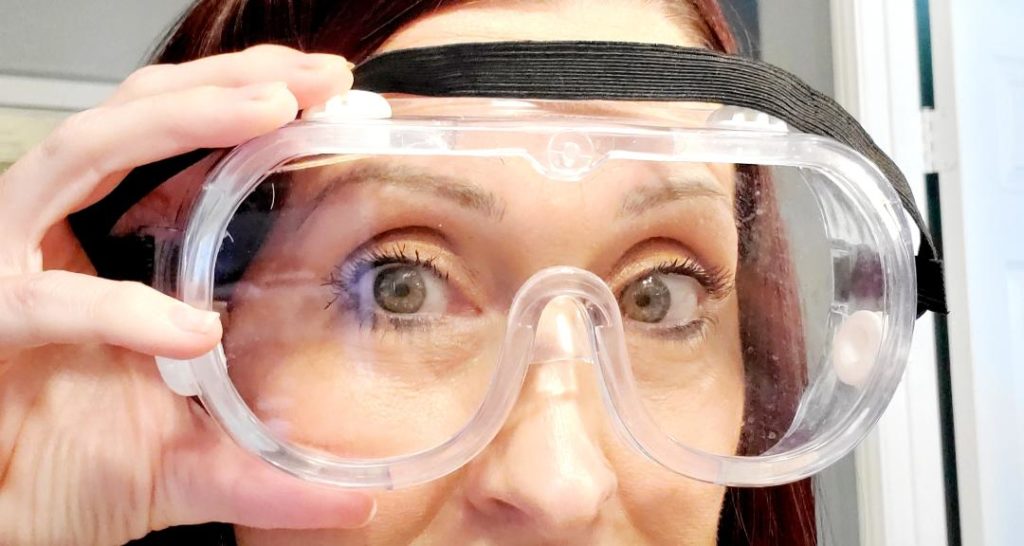
It is recommended to not get your brows wet for 7-14 days. Do not have direct contact with the shower head. You can wear “work protection googles” when in the shower, to help protect from the water splashes. You can find full eye gear at stores like Lowes, Home Depot, Walmart and the dollar store also has them available. Some Artists also recommend to use a thin layer of Vaseline to cover your eyebrows when in the shower. BUT, you MUST gentle wipe this off as soon as you get out of the shower.
*Wash your hair in the sink with help or use a dry shampoo for a few days.
Day 1-5 The healing process has started. The “day of” your brows will POP and look amazing! When you wake up the next morning, you may think… WHAT THE HECK DID I DO????? Your brows will be very dark and defiantly “Have a POP of color”. Don’t worry, this is not what they are going to look like. Over the next few days, they may start to ‘Itch” a little but DO NOT… I repeat DO NOT scratch them!!!! This will damage the ink/pigment and your brows. Read the care instructions I mention in the article to see how to combat the the itchy brows!
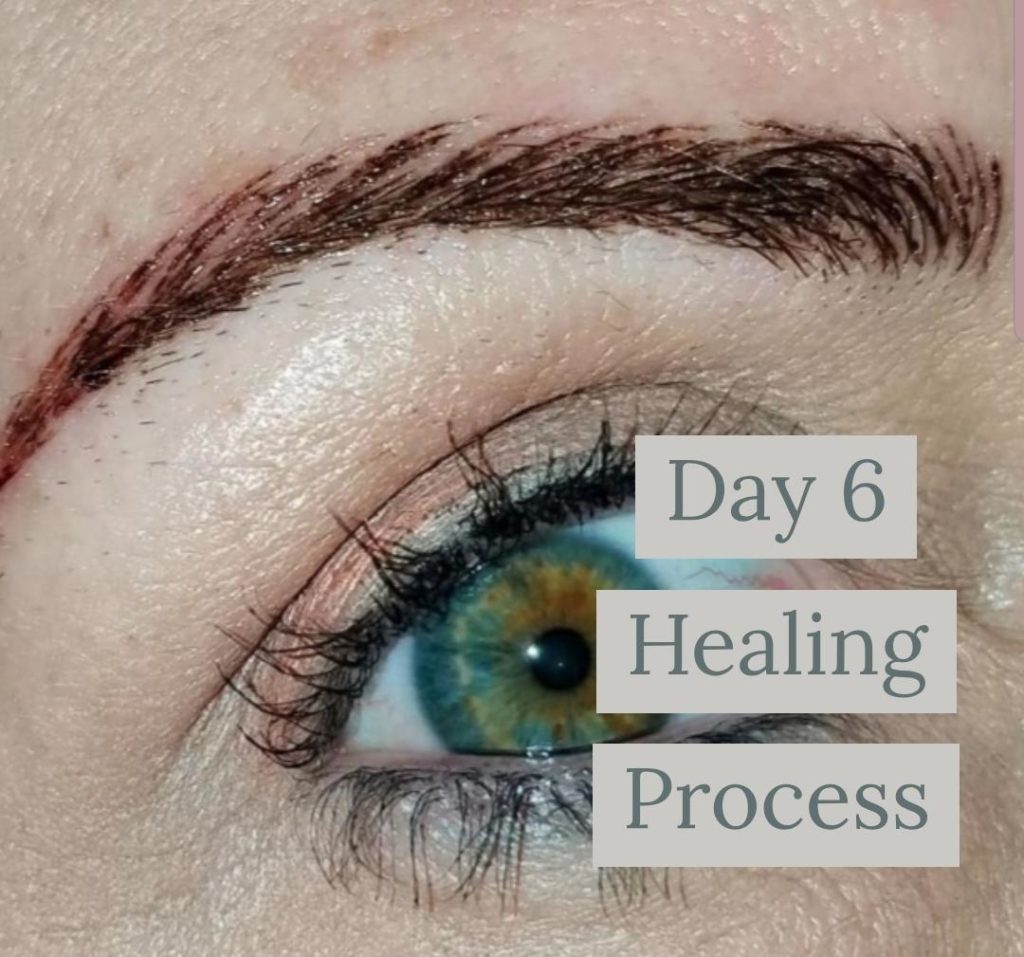
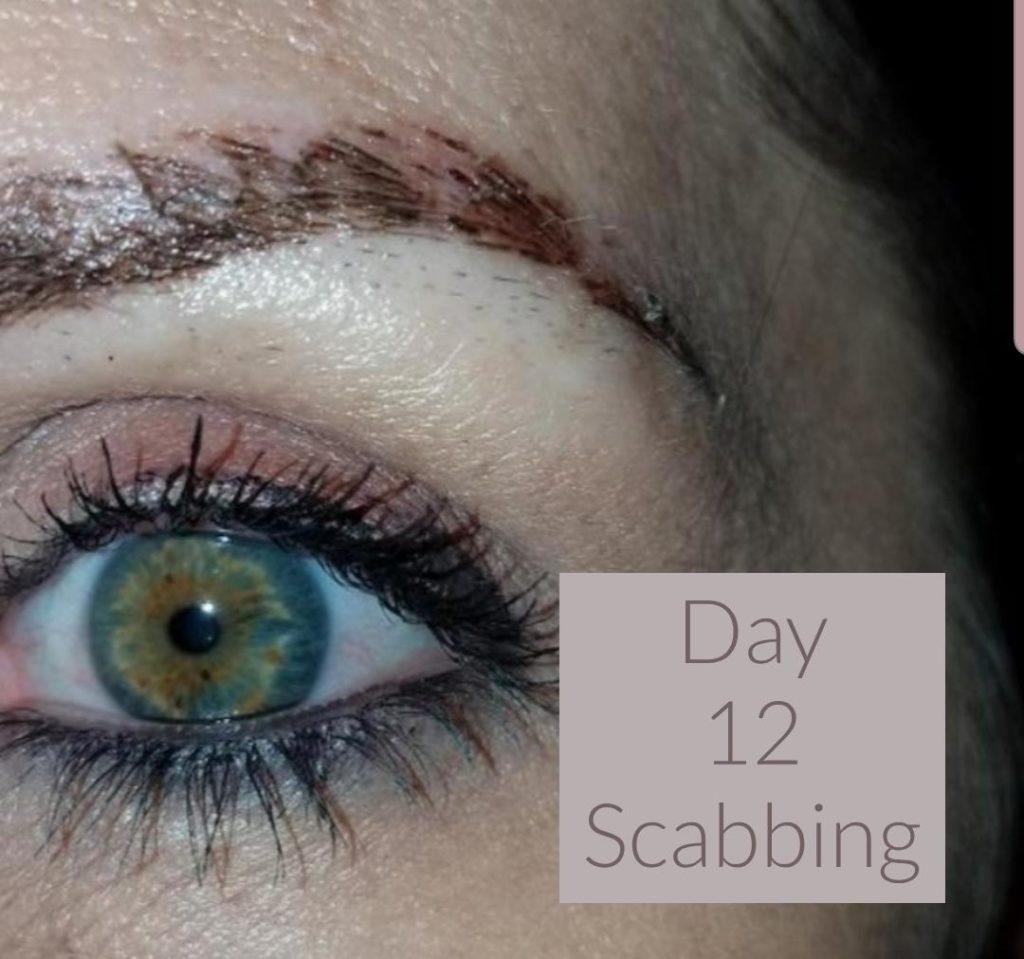
Day 6-12
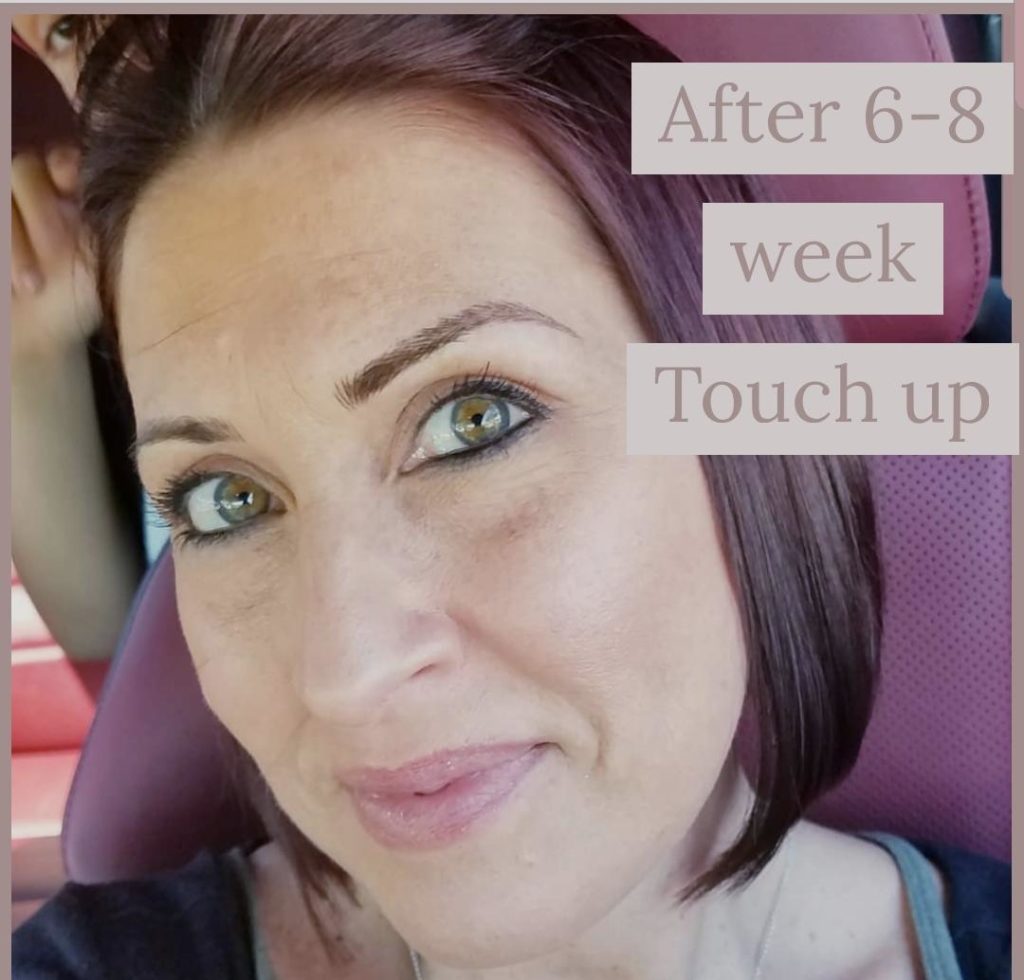
Your brows may start to “flake” or “scab”. Again, this is part of the healing process. I know it is hard but try to control yourself from rubbing, picking or scratching. Some people scab and other don’t. I scabbed a little with my first application, but on my 6-8 week touch up, I had no scabbing at all.
Day 12 +
Over the next few weeks as your brows heal, you will notice that they fade. Let me tell you, don’t freak out! This is also part of the healing process. A translucent like film will cover the ink. Once you’re brows fully heal the color will come back. It is scary and frustrating if you are not aware of this! By your 6-8 week touch -up your brows will start to transform back into what you had hoped that they would look like.
Important Tips on Microblading
#1 RESEARCH
Follow artists, check out Pinterest for inspiration. Follow them on social media.
Once you find an Artist, stalk their page. Check out their work, read reviews and make sure it is a good fit for you.
Make sure that they are licensed, experienced and a clean-sterile environment.
Purchase these items:
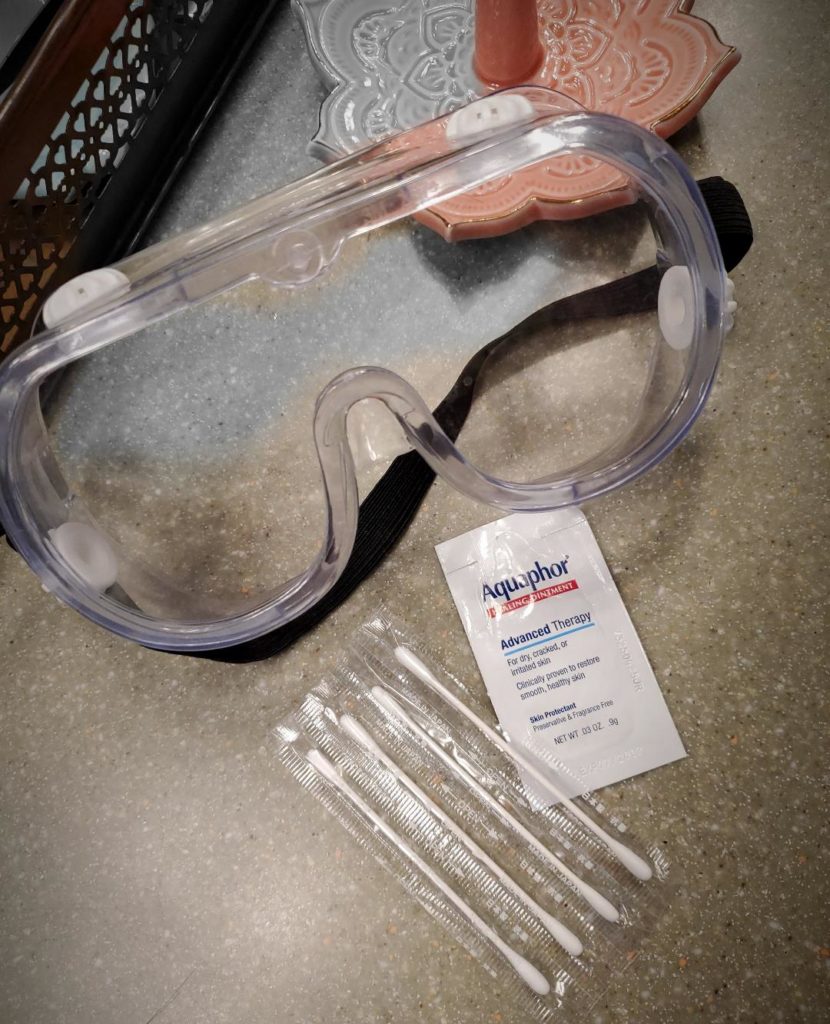
If your Licensed Microblading Artist does not supply these items for you in a care kit, I recommend the following:
Sterile cotton pads
Sterile cotton swabs
Witch Hazel
Aquaphor ointment
Safety Googles
I’ve helped you out by posting a few recommended items. Click link to order-
What to expect after your Microblading session-
Your eyebrows will go through several phases during the healing cycle.
Days 1-4
The pigment will appear very SHARP and dark. This is because the pigment is still sitting on the top of your skin, and has not yet settled in completely. The color of the pigment will soften gradually. Don’t be alarmed if you see some pigment on the cotton swab, as this is extra pigment and/or body fluid that is naturally exiting your skin. Your brows may swell and appear larger.
Days 5-7
Once the healing of the skin starts taking place, it will look like dandruff flakes or dry skin. This might give you the impression that the pigment is fading too quickly, however, this is just superficial color and dry skin being removed from your eyebrows.
Days 8-12
Your brows may look as though the pigment has completely faded-DO NOT PANIC- take a deep breath and TRUST the process.
Days 14-18
Your brows may still look a little patchy or uneven, but the pigment will start to “re-appear” as the pigment settles and the healing continues.
You may want to get your touch-up/perfecting process procedure done at the 6-8 week point, NO SOONER then that. You need to allow for complete healing of the brows.
Pro-Tip
Once completely healed, always apply a layer of sunscreen SPF 50 on your eyebrows when exposed to the Sun. Sun exposure MAY cause the color pigment to fade.
The following MUST be avoided during all 14 days post-microblading
- Increased sweating
- Practicing Sports or exercising
- Swimming
- Hot sauna, bath or jacuzzi
- Sun tanning or salon tanning
- UV/UVA rays or chemicals as they have been known to cause a shift in color or premature fading
- Any laser or chemical treatments or peeling, and/or any creams containing Retin-A or glycolic acid on the face or neck
- Picking, peeling, or scratching of the micro pigmented area in order to avoid scarring of the area or removal of the pigment
- Performing tasks related to heavy household cleaning such as garage or basement cleaning where there is a lot of airborne debris
- Drinking alcohol in excess, as it may lead to slow healing of wounds
- Driving in open air vehicles such as convertibles, boats, bicycles or motorcycles. Debris can get into area.
- Touching the eyebrow except for when rinsing and applying the post care cream with a cotton swab
- Spicy food
- Smoking
- Recommended no make- up on brows till fully healed
- Wait to have brows waxed, threaded or tweezed until brows heal
Microblading- Post care
Below are a few suggestions:
*During shower, keep your face away from the showered by using googles or take a bath. When washing hair, use sink and assistance.
Day 1 (day of treatment)
2-3 hours after treatment, gently clean the area with witch hazel or sterile water on a clean cotton pad. Make note- damp NOT wet! Do this 2-4 times a day to avoid buildup of blood/lymph on that area.
Day 2 & 3
When you wake up, gently wipe the area with a clean cotton pad, dampened with a small amount of witch hazel. Be extra careful to NOT rub or tug brows hard. Do this 2-4 times a day to both brows.
*Make sure that your hands are clean before touching your brows!
Use a clean cotton swab (tip) and apply a very small amount of AQUAPHOR (size of a grain of rice) to both brows. Brows should not be greasy-shiny. Applying a tiny amount will help soothe and heal brows.
Day 4-14
Gently clean the brow area as directed above and apply the aquaphor as needed.

My Artist
Julie Taing was my Artist, she has over 18 years experience in the industry. Julie is based out of San Diego, Ca. She has traveled all over the World and is an Amazing Professional Make Up Artist who has worked on some pretty big and exciting projects! She found a passion for Microblading and now resides in Beautiful San Diego.
You can read more about her here- https://www.powaypermanentmakeupartist.com
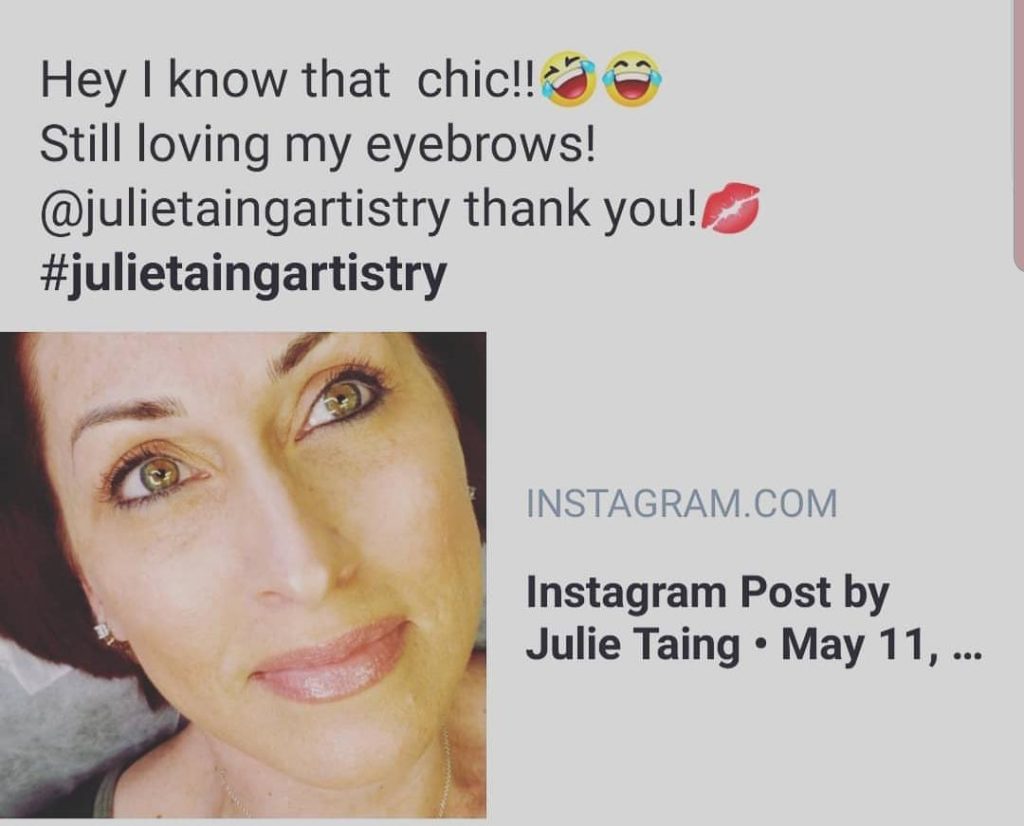
Please follow her on instagram #julietaingartistry
Pinterest https://bit.ly/2n2Oj0T
Update-
It has been 6 months since my touch up and I am still very pleased. I feel that it took a little time for things to settle, but now the true color and shape has appeared.

I hope this helped answer some of your questions regarding microblading.
Love and Light,
Christy XO
follow me and check out my other stories-https://www.chasingthesunshineblog.com